Help Center
Creating Class in SEEP App
This section of the SEEP Mobile Application allows teachers to create a class timetable.
Step 1: Enter Class Info
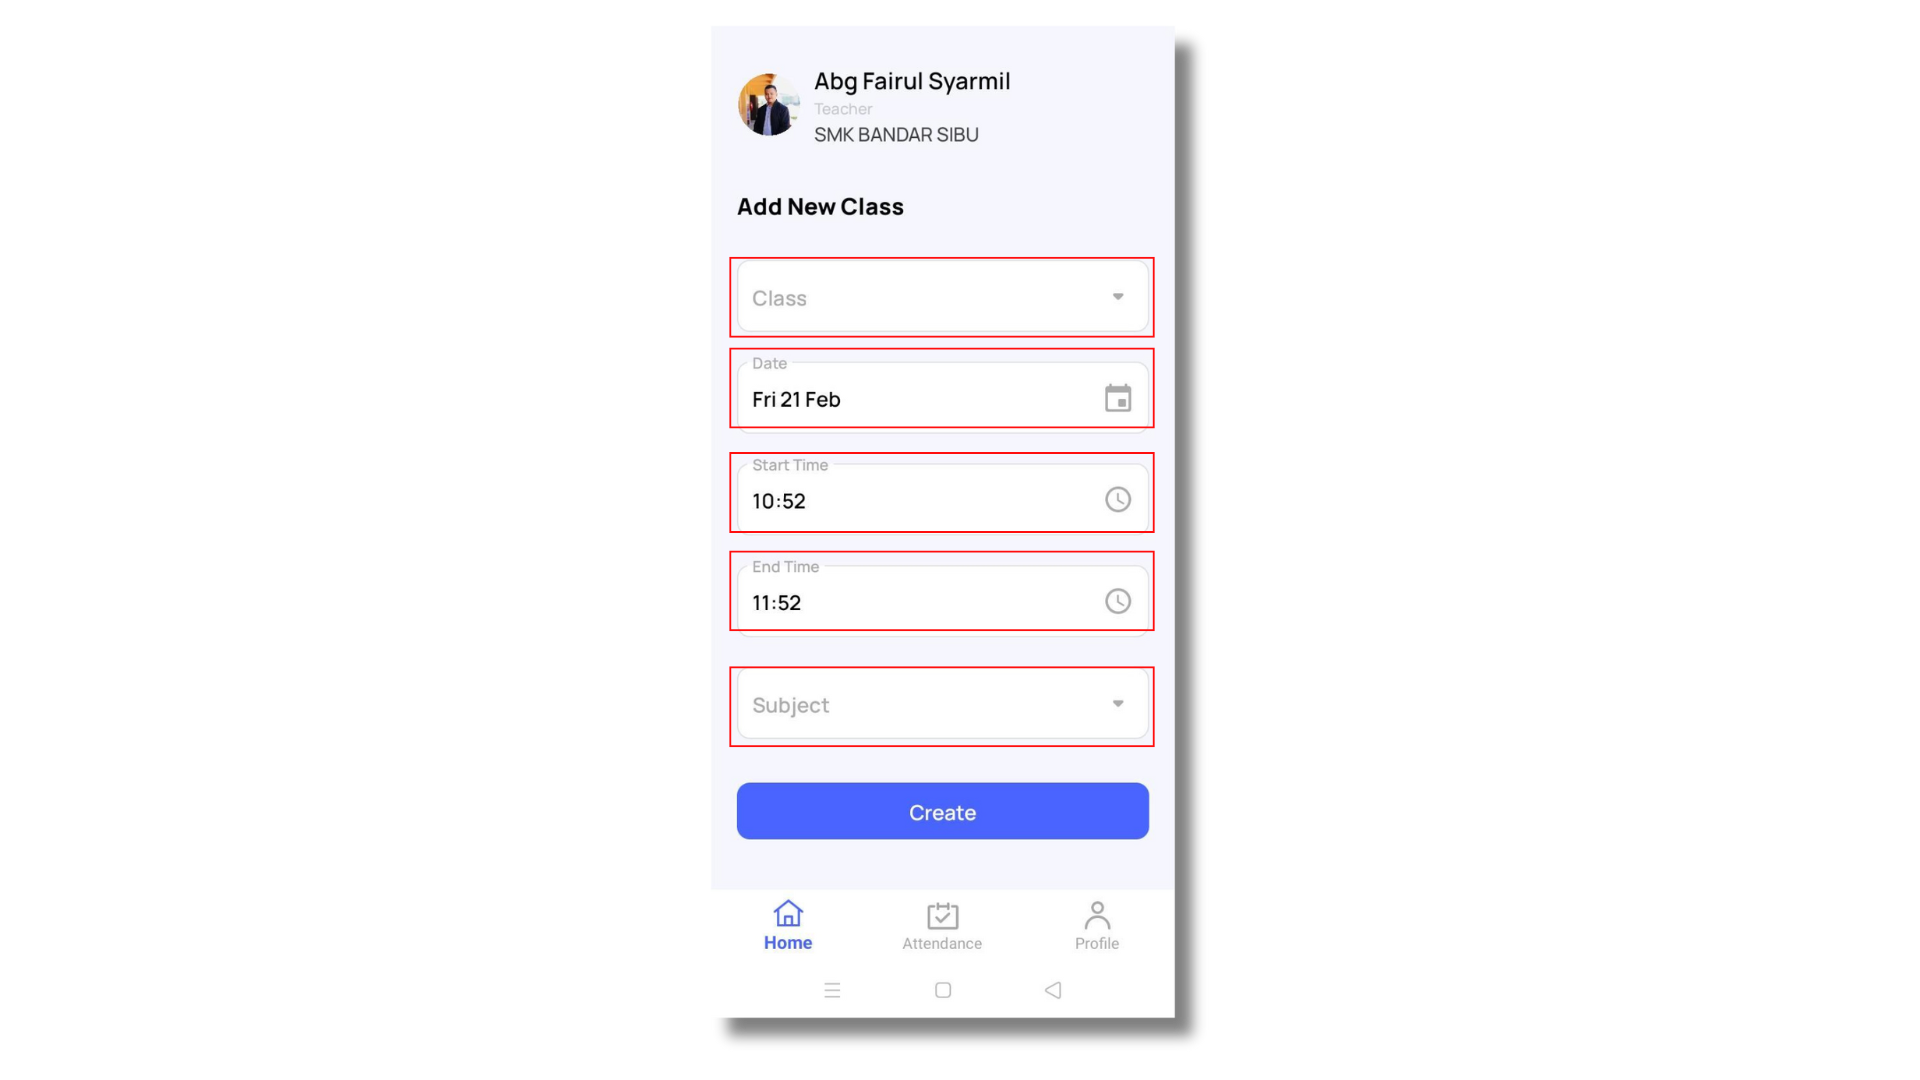
This includes by entering essential details such as class name, date, start time, end time, and subject.
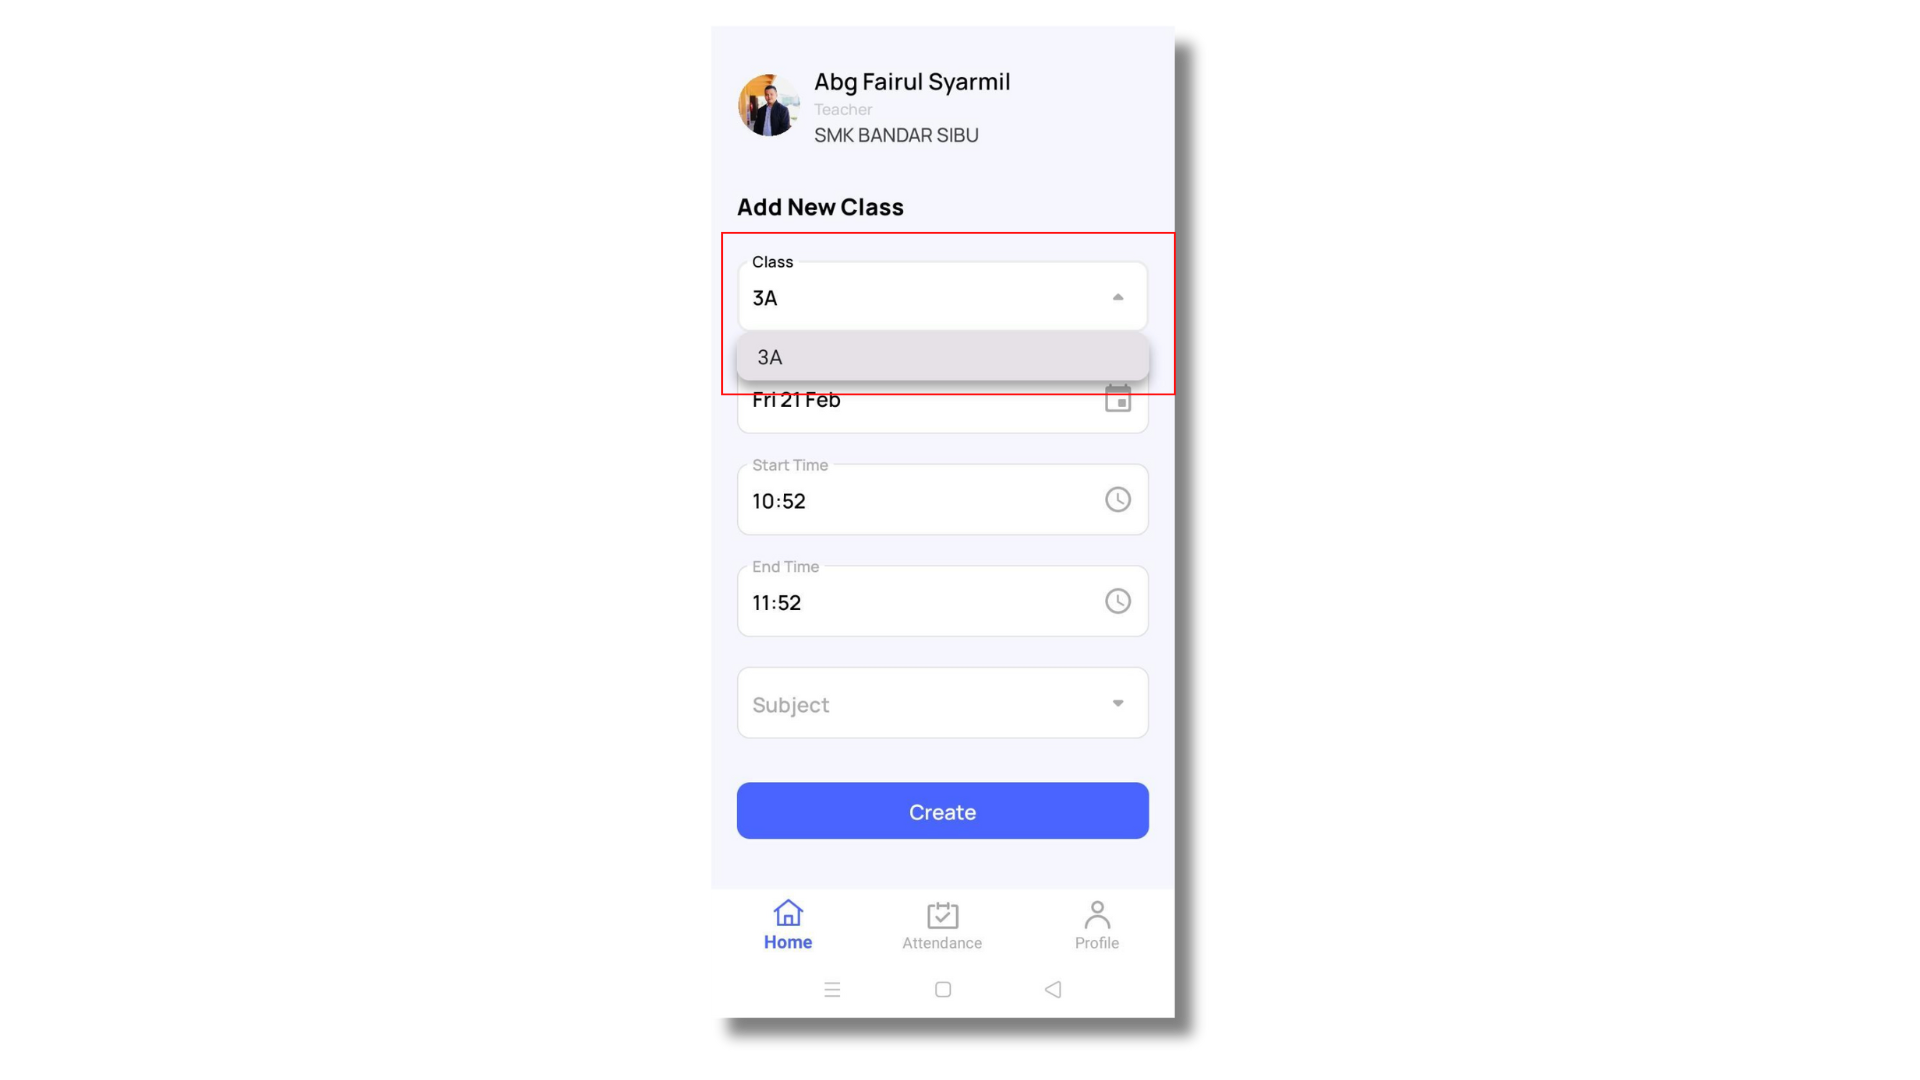
- Class Selection: Tap on the dropdown menu [Class] and choose the appropriate class.

- Date Selection: Click on the [Date] field to open a calendar and select the date for the class.
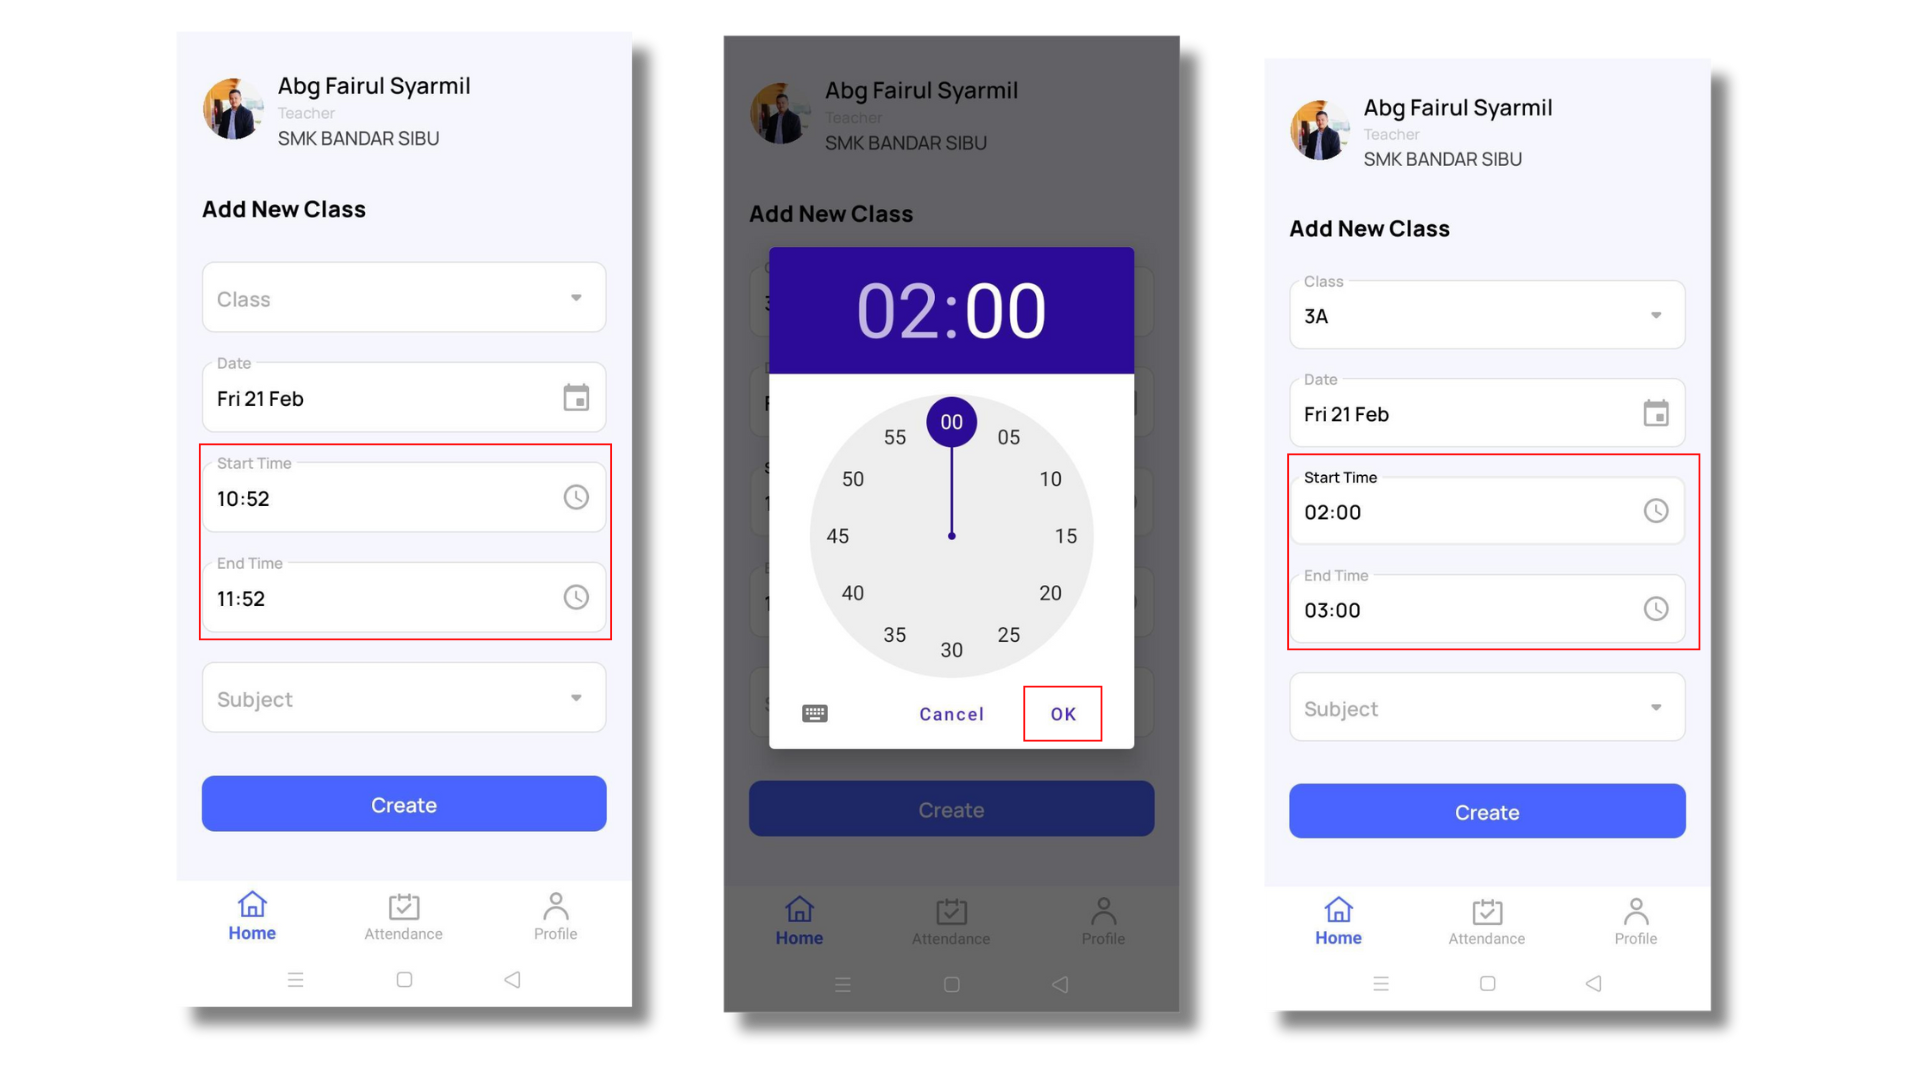
- Start and End Time: Tap on the clock icons next to [Start Time] to set the desired class duration.
- Tap on [OK] when you are done and the [End Time] will automatically be set an hour after [Start Date]
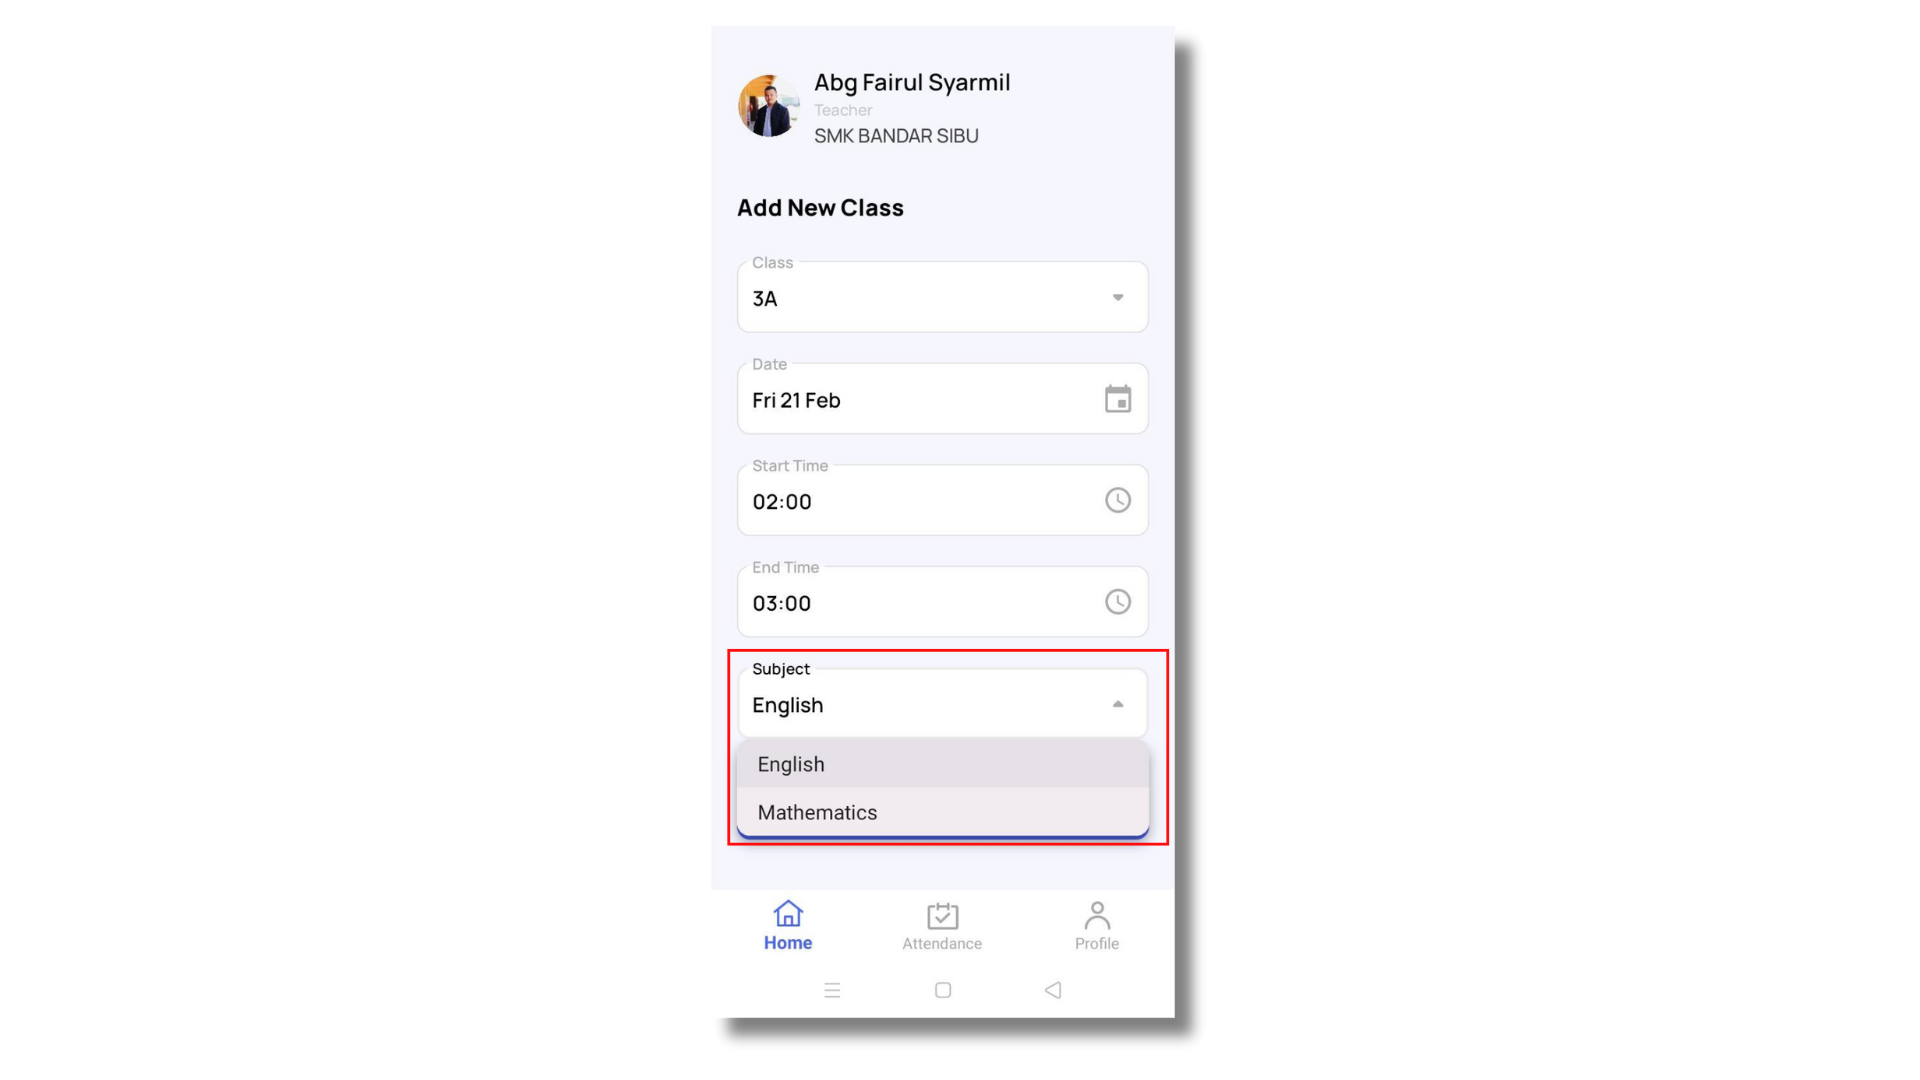
- Subject Selection: Choose the subject from the dropdown menu.
- Create Class: Once all details are filled in, tap the [Create] button to save the class schedule.
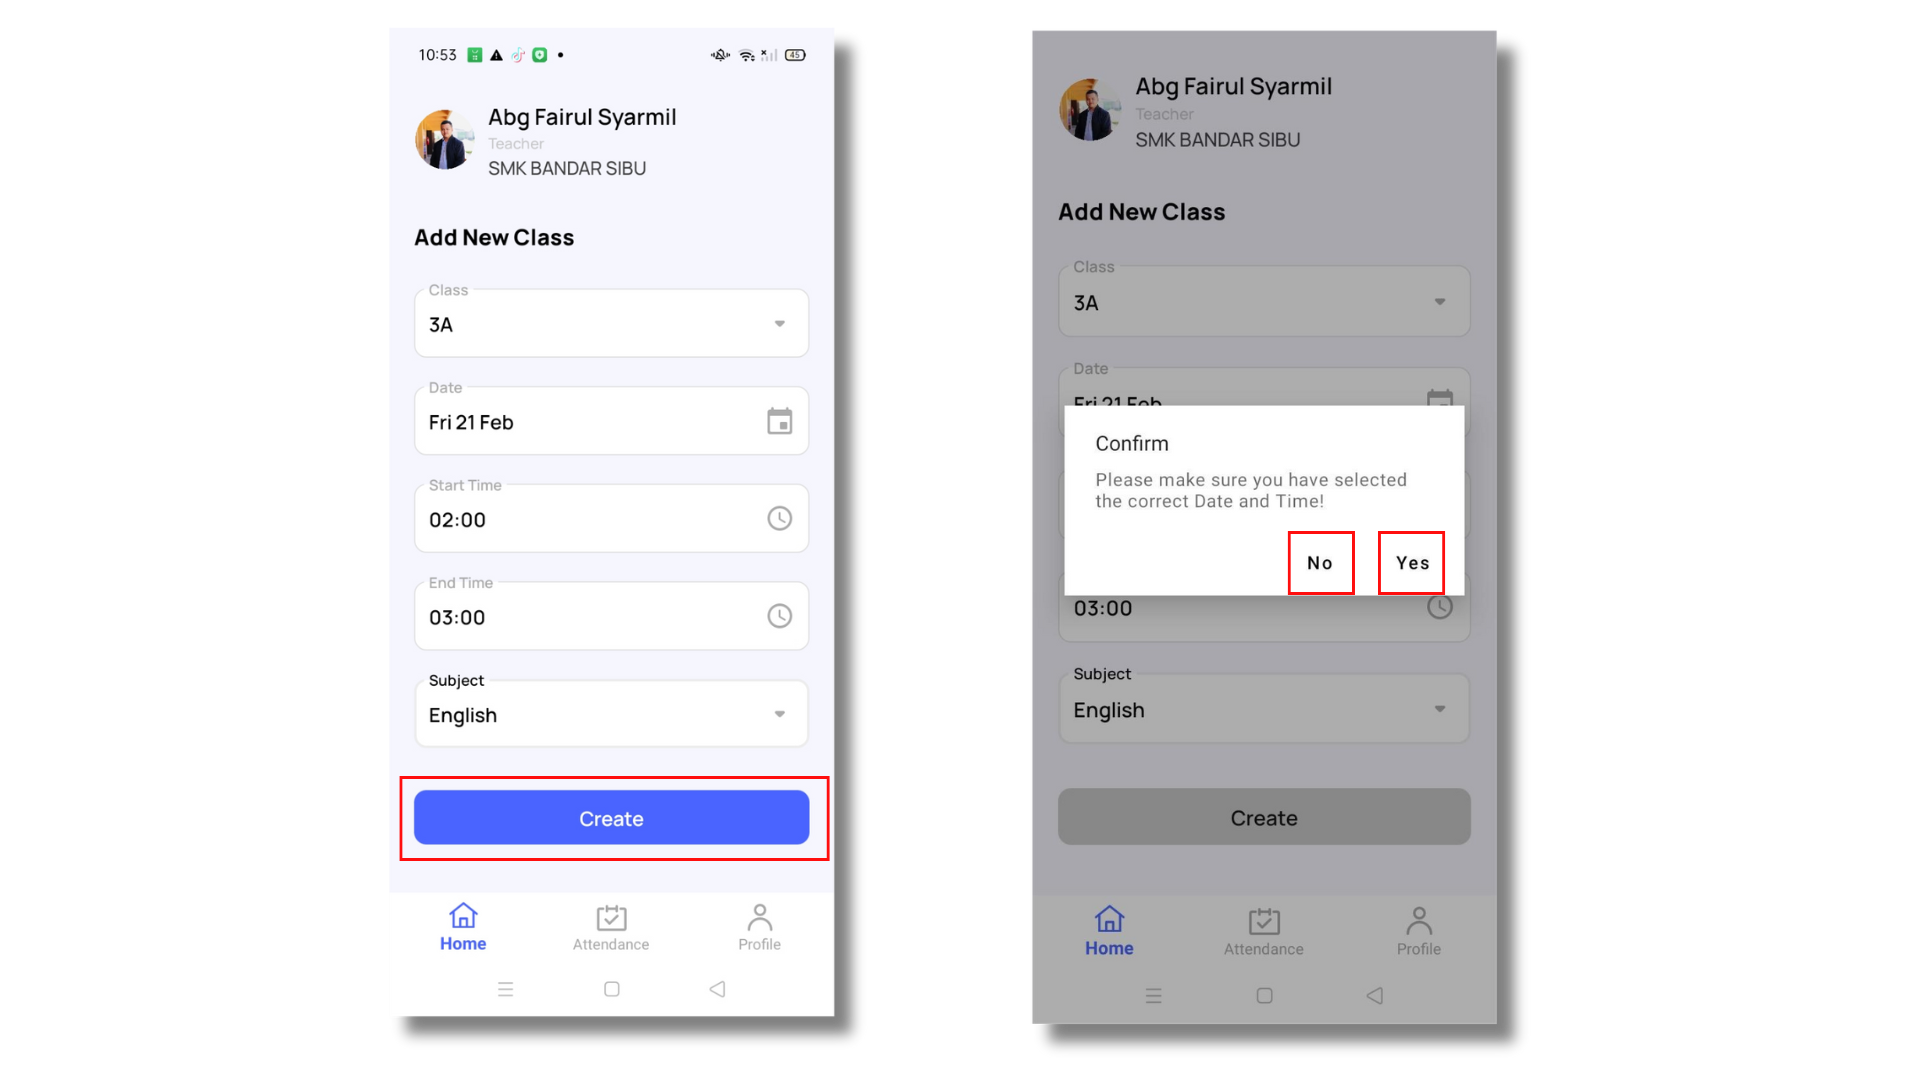
- Confirmation: Tap on [No] to double check the class details input and [Yes] when all details are correct.